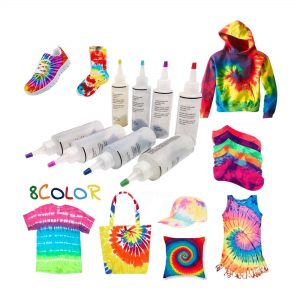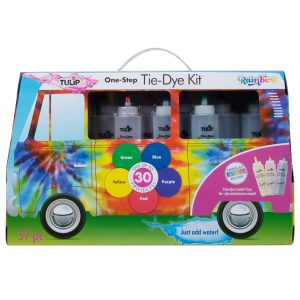
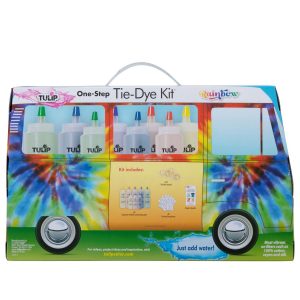

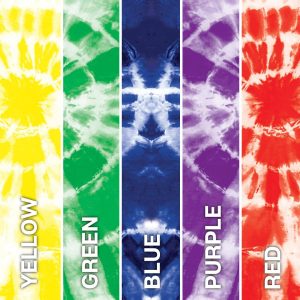
Get the full tie-dye experience with the Tulip Road Trip Rainbow 5-Color Tie-Dye Kit! Tie dye tote bag kit includes 5 (4 fl oz) one-step dyes in basic rainbow color palette (green, yellow, red, blue, purple), plus 3 (2.75 fl oz) mini bottle dyes (red, blue, green), gloves, rubber bands and project guide. This kit will add bright rainbow tie-dye fun to your wardrobe!
A tie dye tote bag kit typically includes everything you need to create your own unique tie-dye design on a tote bag. The contents of the kit may vary depending on the brand and supplier, but typically it will include a plain tote bag, a variety of dye colors, rubber bands or string for tying the fabric, and instructions on how to create different tie-dye patterns. Some kits may also include gloves, a plastic cover to protect your work surface, and other accessories to help you create your design.
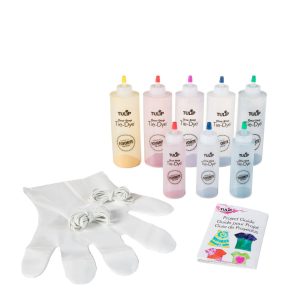
The Tulip Rainbow Road Trip 5-Color Tie-Dye Kit comes with 8 gloves, 40 rubber bands, 3 (2.75 fl. oz.) tiny bottles of dye (Red, Blue, Green), and 5 (4 fl. oz.) One-Step Dyes in an essential rainbow palette (Green, Yellow, Red, Blue, Purple), and a project guide. up to 30 projects using dye. (Note that the number of projects depends on the size of the garment and the quantity of dye applied.) Every single one of Tulip’s one-step dyes is non-toxic and suitable for crafters of any age or skill level. On fabrics made of natural fibers, One-Step Dyes perform at their finest and shine the brightest. Dye is safe to machine wash, and colors maintain their vibrancy over several items of washing.
The number of projects depends on the size of the garment and the quantity of dye applied. Prior to washing, dyes may seem darker on moist cloth; after washing, they will naturally become lighter. If the tie-dye bottle has a water fill line, fill it with water until it is approximately an inch from the top, leaving space for the dye to be mixed and shaken.
Tie dyeing has been around for centuries, and it is a trend that never seems to go out of style. This fun and easy DIY activity is perfect for creating unique and personalized items, like a tie dye tote bag. With a tie dye tote bag kit, you can create a functional and stylish accessory that reflects your personality and fashion sense.
Choosing the Right Tie Dye Tote Bag Kit:
When it comes to tie dye tote bag kits, there are many options available in the market. Some kits come with pre-made designs, while others allow you to create your own unique patterns. Look for a kit that includes high-quality materials, such as natural fiber tote bags and vibrant dye colors. You’ll also want to make sure the kit includes instructions on how to properly tie and dye the tote bag.
Preparing Your Work Area:
Before you start tie dyeing, it’s important to prepare your work area properly. Cover your work surface with plastic or an old tablecloth to protect it from any dye spills. Wear old clothes or an apron to avoid staining your clothes. You’ll also want to make sure you have all the necessary supplies, including gloves, rubber bands, and a large plastic bag for storage.
Creating Your Tie Dye Tote Bag Kit:
Now it’s time to get creative! Start by wetting your tote bag thoroughly and wringing out any excess water. Next, use rubber bands to create your desired design on the bag. There are countless ways to create patterns using rubber bands, from stripes to swirls to starbursts. Once you’ve created your design, mix the dye according to the instructions and apply it to the tote bag. You can use one color or multiple colors to create a unique tie dye effect. After applying the dye, place the tote bag in a plastic bag and let it sit for the recommended amount of time.
Rinsing and Finishing Your Tote Bag:
After the dye has set, it’s time to rinse your tote bag thoroughly. Start by removing the rubber bands and rinsing the tote bag in cold water until the water runs clear. Then, wash the tote bag in warm water with a mild detergent and rinse again. Finally, dry the tote bag in the dryer or hang it outside to dry. Once it’s dry, your tie dye tote bag is ready to use!
A tie-dye tote bag kit has several advantages, including:
Creativity and Individuality: With a tie-dye tote bag kit, you can create your own unique design and express your creativity through color and pattern choices. This allows you to create a one-of-a-kind tote bag that reflects your personal style.
Cost-Effective: Tie-dye tote bag kits are generally affordable and offer great value for money, especially when compared to buying pre-made tie-dye tote bags. The kit includes everything you need to create your own tie-dye design, making it a cost-effective way to customize a tote bag.
Easy to Use: Tie-dyeing is a simple and fun process that doesn’t require any special skills or experience. The kit typically includes clear instructions, making it easy to get started on your tie-dye project.
Eco-Friendly: Many tie dye tote bag kits use natural dyes and materials, making them an eco-friendly choice. Additionally, by creating your own tote bag instead of buying a new one, you are reducing waste and contributing to a more sustainable lifestyle.
Versatile: Tie dye tote bag kits can be used for a variety of purposes, including as a stylish and functional shopping bag, a beach or pool bag, or even as a personalized gift for a friend or family member.
Yes, you can definitely customize your design with a tie dye tote bag kit. Tie dyeing allows for endless creative possibilities, and you can create unique patterns and designs on your tote bags. Here are some techniques and patterns recommended for beginners using a tie dye tote bag kit:
Spiral Pattern: This is a classic tie dye pattern that involves twisting the fabric into a spiral shape and applying different colors of dye to create a vibrant, swirling design.
Crumple or Scrunch Technique: This technique involves randomly scrunching or crumpling the fabric of the tote bag to create a textured, mottled effect. Apply different dye colors to different sections for a visually dynamic result.
Bullseye or Target Pattern: This pattern involves folding the tote bag in an accordion-style or pleating it and then applying dye in concentric circles or rings. It creates a striking bullseye effect with distinct color bands.
Stripe or Chevron Pattern: For a simpler design, you can create vertical or horizontal stripes on the tote bag using rubber bands or by folding the fabric. You can experiment with different color combinations for a bold, graphic look.
Ombre Effect: The ombre effect involves creating a gradient of color from light to dark or vice versa. You can achieve this by dipping or gradually applying dye along one end of the tote bag and then gradually diluting or intensifying the color as you move towards the other end.
Remember to follow the instructions provided with the tie dye tote bag kit for specific dye application techniques and recommended dye-to-water ratios. It’s also a good idea to practice on a small scrap of fabric or an extra tote bag before working on your final design to get a feel for the dye and experiment with different techniques. Have fun and let your creativity flow!
The compatibility of a tie dye tote bag kit with different materials can vary. Generally, tie dyeing works best on natural fibers like cotton, rayon, or hemp, as these materials absorb and hold the dye well. However, it may be more challenging to achieve vibrant and long-lasting results on synthetic fibers like polyester.
Here’s a breakdown of common tote bag materials and their suitability for tie dyeing:
Cotton: Cotton is one of the most popular materials for tie dyeing. It absorbs dye effectively, resulting in vibrant and durable colors. Most tie dye tote bag kits are designed for use on cotton fabric, so they are ideal for cotton tote bags.
Canvas: Canvas is a sturdy cotton-based material that can also be successfully tie dyed. It offers a slightly different texture and look compared to regular cotton fabric, but the dyeing process and results are similar.
Rayon: Rayon is a semi-synthetic material made from cellulose fibers. It can be tie dyed, but keep in mind that rayon is more delicate than cotton and may require more gentle handling during the dyeing and washing process.
Polyester and Synthetic Blends: Tie dyeing polyester can be more challenging due to its resistance to absorbing dye. Traditional water-based dyes may not work well on polyester, resulting in faded or washed-out colors. However, there are specialized polyester dyes and techniques available that can yield better results on polyester or polyester-blend tote bags. It’s recommended to use a dye specifically formulated for synthetic fibers and follow the instructions carefully.
Before attempting to tie dye a tote bag made of a particular material, it’s advisable to check the care instructions and any specific recommendations from the manufacturer. Additionally, conducting a small test on a hidden area or scrap fabric can help determine the compatibility and suitability of the material with the tie dyeing process.
The contents of a tie dye tote bag kit may vary depending on the specific brand or product you choose. However, here are the common components typically included in a tie dye tote bag kit:
Tote Bags: The kit usually contains one or more plain, white tote bags made of cotton or a cotton-blend fabric. The number of tote bags provided can vary, so it’s best to check the product description or packaging.
Dye: The kit will include a selection of tie dye colors in squeeze bottles or powder form. These dyes are specially formulated for tie dyeing and often come in vibrant shades.
Rubber Bands: Rubber bands are essential for creating the resist patterns and securing sections of the tote bag before dye application. They are used to create the characteristic “tie” in tie dye.
Protective Gloves: Tie dye tote bag kit typically include a pair of protective gloves to shield your hands from the dye and prevent staining.
Plastic Squeeze Bottles: Some kits may provide plastic squeeze bottles for mixing and applying the dye. These bottles allow for precise application and control over the dye placement.
Instructions: A set of instructions or a guidebook is typically included to provide step-by-step guidance on tie dye techniques, color mixing, and various patterns you can create.
Please note that the specific materials you need to provide may vary depending on the kit. However, some commonly required items that you may need to provide include:
Water: You’ll need water for mixing the dye and rinsing the dyed tote bags after the dye has set.
Plastic or Ziplock Bags: These are useful for enclosing the dyed tote bags during the dye setting process, allowing the colors to develop and penetrate the fabric.
Plastic Wrap or Plastic Table Cover: This can be used to cover your work surface to protect it from dye stains.
It’s always a good idea to read the product description or packaging of the specific tie dye tote bag kit you choose to ensure you have a clear understanding of what is included and what additional materials you may need.
Welcome contact us!
Copyright © 2022-2024 Zhi Nian Horticulture (Xiamen) Co., Ltd. All rights reserved